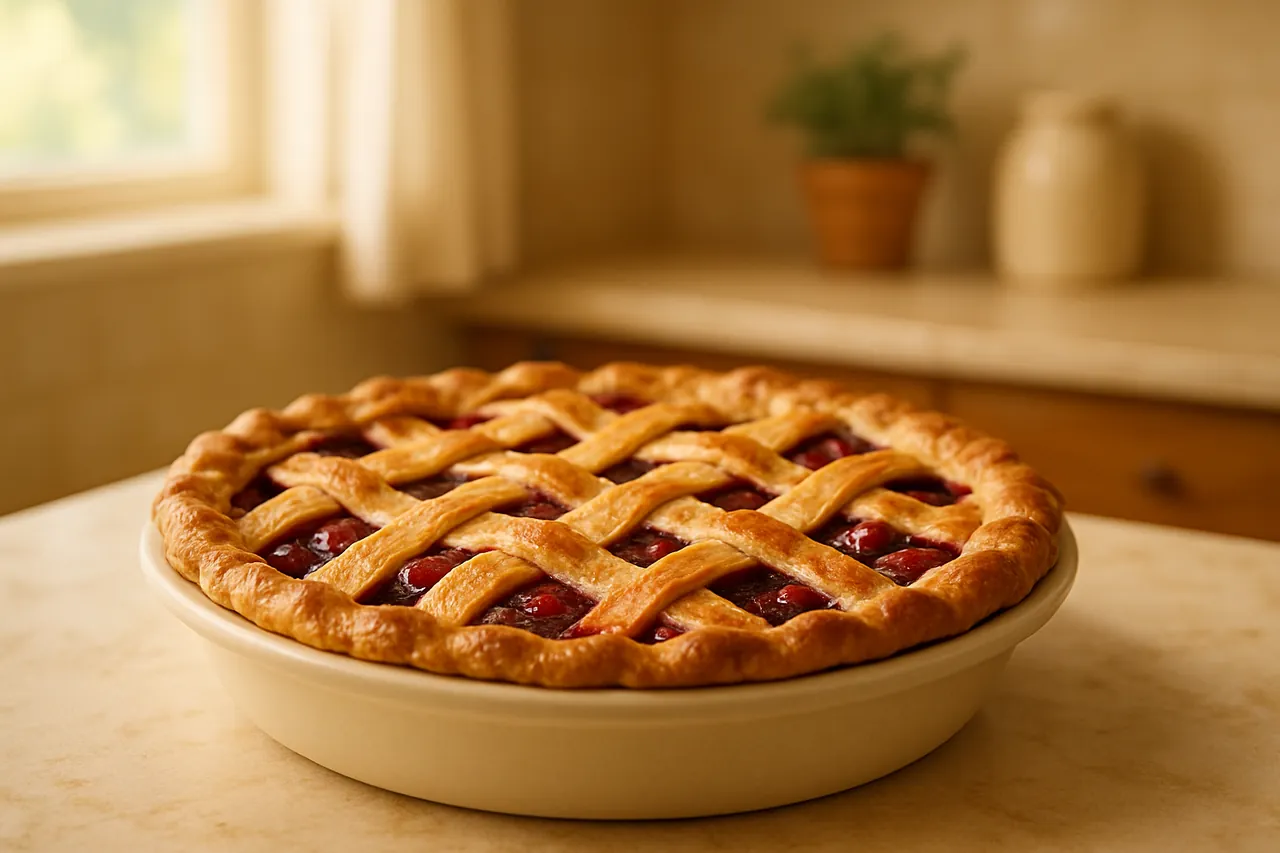
A flaky, buttery crust with a juicy, sweet-tart cherry filling.
This classic cherry pie brings together a flaky, buttery crust with a juicy, sweet-tart cherry filling. It's the perfect dessert for any occasion, whether it's a summer picnic or a cozy holiday gathering.
Why you'll want it now, Nostalgic and comforting, with a perfect balance of sweet and tart.
Why this recipe works
Using fresh or frozen cherries ensures a vibrant, juicy filling, while a touch of almond extract enhances the fruit's natural flavor. A lattice crust not only looks beautiful but also allows steam to escape, preventing a soggy bottom.
Equipment
Mixing bowls
Rolling pin
9-inch (23 cm) pie pan
Pastry brush
Baking sheet
Parchment paper
How to make it
Prepare the pie crust: In a large bowl, whisk together flour, sugar, and salt. Add cold butter cubes and cut in using a pastry cutter until the mixture resembles coarse crumbs.
Gradually add ice water, one tablespoon at a time, mixing until the dough comes together. Divide the dough in half, shape into discs, wrap in plastic, and chill for at least 1 hour.
Preheat the oven to 400°F (200°C).
Prepare the cherry filling: In a large bowl, combine cherries, sugar, cornstarch, lemon juice, almond extract, and salt. Mix well and set aside.
Roll out one disc of dough on a lightly floured surface to fit a 9-inch (23 cm) pie pan. Transfer to the pie pan and trim excess dough.
Pour the cherry filling into the crust, spreading evenly.
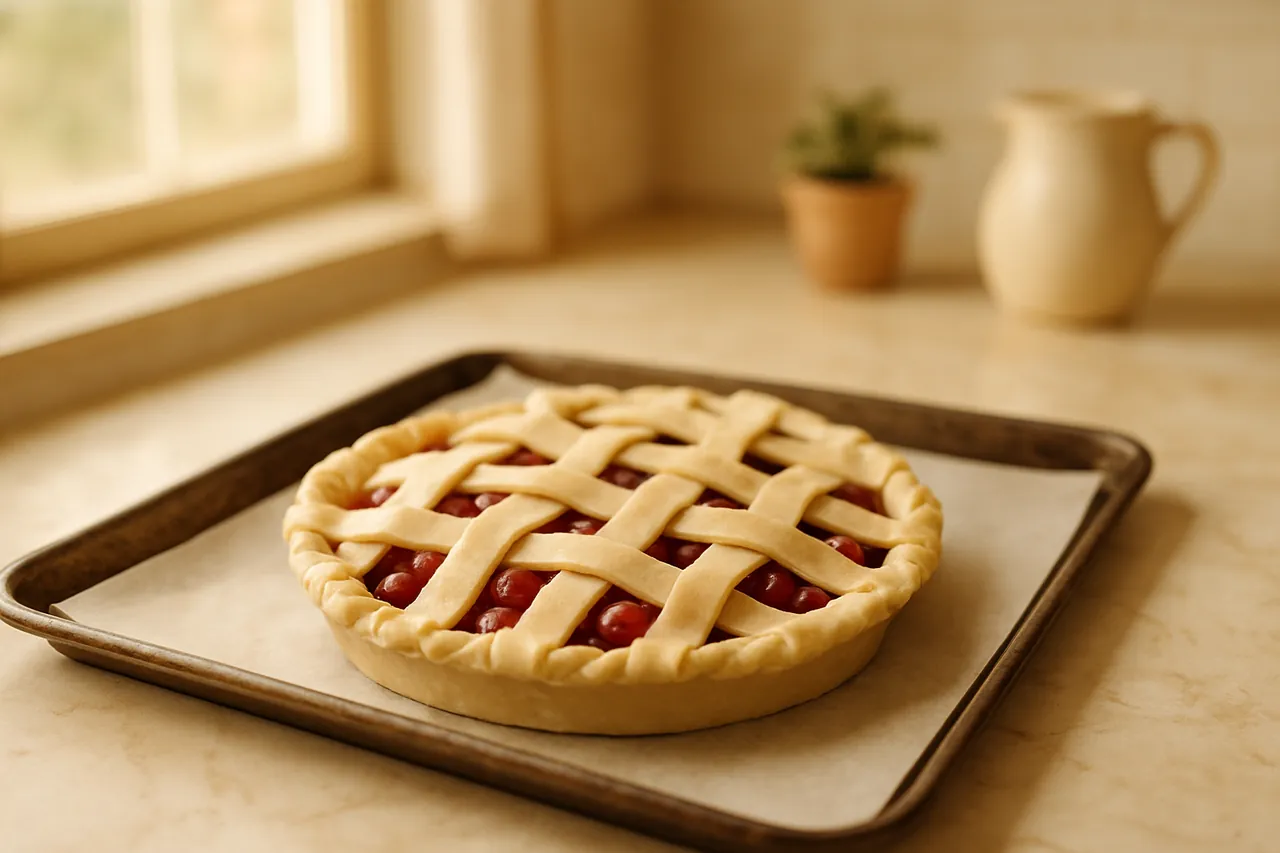
Roll out the second disc of dough and cut into strips for a lattice top. Arrange over the filling, weaving strips to form a lattice. Trim and crimp the edges.
Brush the lattice with egg wash. Place the pie on a baking sheet lined with parchment paper.
Bake for 50-60 minutes, or until the crust is golden and the filling is bubbling.
Cool on a wire rack for at least 2 hours before serving.
Enjoy a slice of this classic cherry pie with a scoop of vanilla ice cream for the ultimate dessert experience.
How you'll know it's ready
The crust should be golden brown and the filling should be bubbling through the lattice.
Convection oven? (and if you don't have one)
If you have a convection oven, lower the temperature to 375°F (190°C) and check the pie a few minutes early, as the fan may bake it faster. Standard oven users, follow the recipe as written.
Troubleshooting
If the crust is browning too quickly, cover the edges with foil.
If the filling is too runny, ensure cornstarch is fully mixed in before baking.
For a soggy bottom, ensure the pie cools on a wire rack to allow steam to escape.
If the dough is too sticky to roll, chill it further before rolling.
Storage
Store leftover pie at room temperature for up to 2 days or in the refrigerator for up to 4 days.
Make ahead
The pie crust can be made and chilled up to 2 days in advance. The assembled pie can be frozen before baking, then baked from frozen, adding additional baking time as needed.
Variations
Use a mix of sweet and sour cherries for a more complex flavor.
Add a teaspoon of vanilla extract for a different flavor profile.
Sprinkle the crust with coarse sugar before baking for extra crunch.
Frequently asked questions
Can I use canned cherries for cherry pie?
Yes, but make sure to drain them well and adjust the sugar as canned cherries are often sweetened.
How do I prevent a soggy bottom crust?
Bake the pie on a lower oven rack and ensure the filling is thickened before adding to the crust.
Can I make the pie crust ahead of time?
Yes, the pie crust can be made and chilled up to 2 days in advance.
What is the best way to pit cherries?
You can use a cherry pitter or a small knife to carefully remove the pits.
Nutrition Facts
Per serving: 1 slice (130 g)
Calories380
Total Fat18 g
Saturated Fat11 g
Cholesterol55 mg
Sodium210 mg
Total Carbohydrate52 g
Dietary Fiber2 g
Total Sugars26 g
Protein4 g
Nutrition information is estimated based on the ingredients used and may vary depending on brands and exact measurements.
Recipe from softsweetdough.com · Soft, sweet desserts worth every bite.